Objective
The main objective of this post is to give a brief introduction to Homing Missiles in Game (2D). A script for Homing missile is also included and explained in the article.
What is a Homing Missile?
What is the logic behind Homing Missiles?
How to use Homing Missiles in Unity?
Have these Questions in Your Mind?
No worries. You will get a satisfactory answer to all those questions, right here.
Let’s start with Introduction
INTRODUCTION
You might have seen Homing Missiles in movies.

Remembered these scenes from “Marvel’s The Avengers” movie?
If you are not a Marvel fan don’t worry, I am here to help.
Homing Missile is the missile which locks target and chases the target until or unless it reaches the target and blasts itself.
There are plenty of games which are using Homing Missiles.
Excited to implement Homing Missiles in your game?
I know you are.
Let’s set the scene first
Scene Setup:
Create two 2D Objects name them “Missile ” and “Target”.
Add a Sprite to them. (You can download the project from below link).
Add rigidBody 2D in missile and add Script also name it as ”Homing Missile”
How it actually works?
You might think It is easy to Implement Homing Missile. Just use MoveToward/Lerp until it reaches the target.
Just write code and look at what is going on in your scene.(First try and then read further to understand)
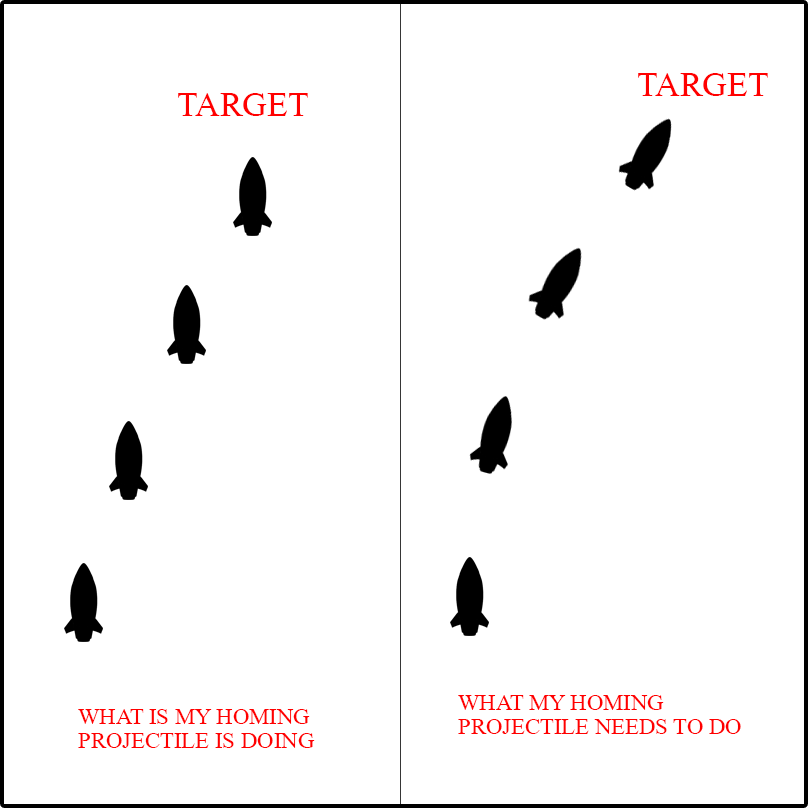
It is reaching the target properly but there is no feel of a rocket. (Right Brain:-What is wrong with my code!)
Below is an actual script for Homing Missiles.
Scripting:
    public class HomingMissile : MonoBehaviour
    {
        public Transform target;
        public Rigidbody2D rigidBody;
        public float angleChangingSpeed;
        public float movementSpeed;
        void FixedUpdate ()
        {
            Vector2 direction = (Vector2)target.position - rb.position;
            direction.Normalize ();
            float rotateAmount = Vector3.Cross (direction, transform.up).z;
            rigidBody.angularVelocity = -angleChangingSpeed * rotateAmount;
            rigidBody.velocity = transform.up * movementSpeed;
        }
    }
I think script is short but not a sweet one. You can use this homing missile script for your code.
Don’t be scared, I’ll show you how to do it.
Let’s start with the table to introduce variables:
Variable Name | Variable Type | Description |
|---|---|---|
rigidBody | RigidBody2D | rigidBody of the missile to add velocity and change angle. |
target | Transform | To get the position of the Target. |
angleChangingSpeed | float | The speed to change the angle |
movementSpeed | float | Speed of movement |
->Pure Mathematics: (Open your Brain’s left part)
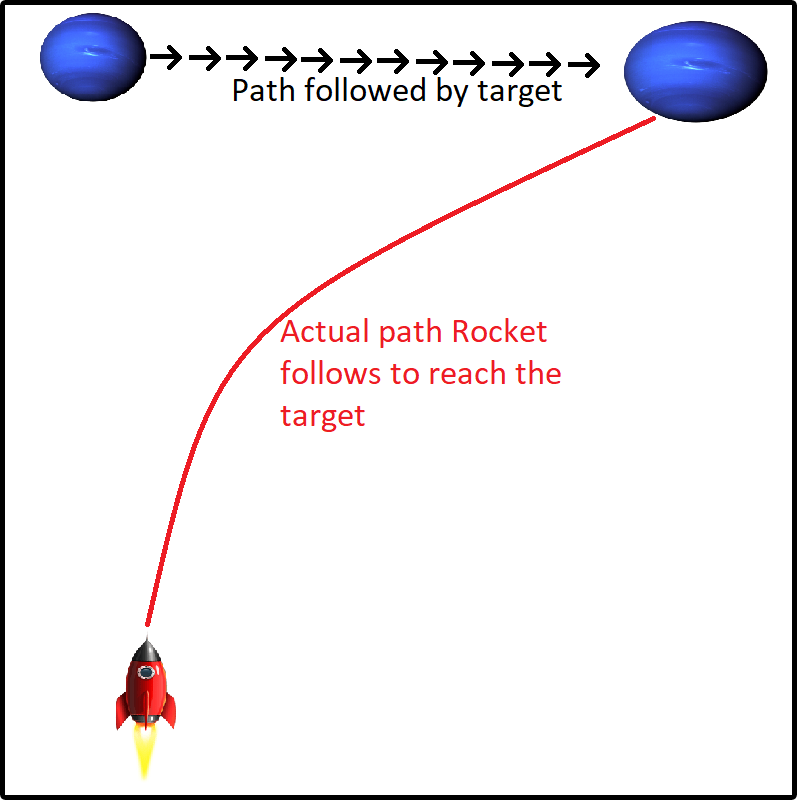
You need to understand this Picture. That’s How our Homing Missile Works.
First, what you need is “Direction”.
STEP: 1
direction= targetPosition (target.position) - missilePosition(rb.position);
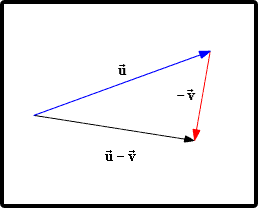
This is how subtraction of two Vector happens (Pythagoras Theorem).
STEP: 2
direction.Normalize();
Normalization means converting vector to unit vector.
Example:
    Vector A(3,4)
    Normalized(A)=(3/3*3+4*4 , 4/3*3+4*4)=(3/5,4/5)
STEP: 3
Find Amount of rotation to do that.
float rotateAmount=Vector3.Cross(direction,transform.up).z;
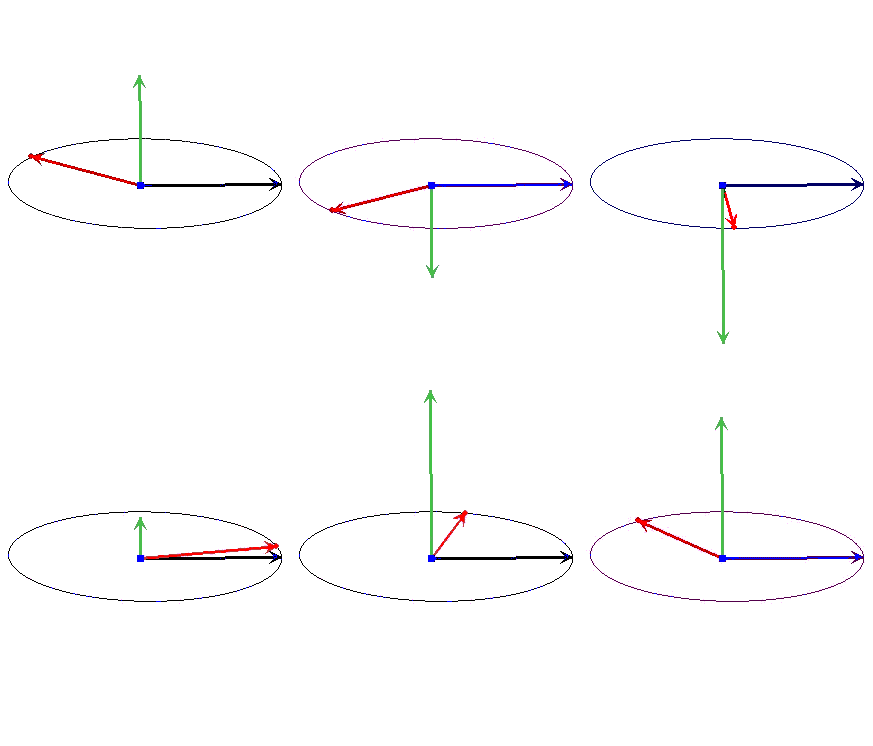
Blue Arrow(direction)
Red Arrow(Missile Transform)
green(Resulting Vector).
All three Vectors are perpendicular to each other.that’s why we needed z-axis only.
STEP: 4
Now we need to change angularVelocity of our rigidBody.
rb.angularVelocity = - angleChangingSpeed * rotationAmount.
Minus Sign(-) is used to reverse the direction of movement.
STEP: 5
Adding Velocity to our rigidBody.(just changing the Angle is not Enough).
rb.velocity=tranform.up * movementSpeed.
Stop cheering just yet! This is not the end! Missile needs balancing between angleChangingSpeed and movementSpeed.
What if there is no balance between angleChangingSpeed and movementSpeed (Great question! Open right brain is needed here ! )


