[Check the original blog post at The Gamedev Guru: Introduction to The P3 Optimization Framework]
Welcome to this lesson on the P3 Optimization Framework.
Before we get into the abstract world of theory and bla, bla, bla, let’s start with one simple question:
Why do we need high-performing projects nowadays? The simple reason is:
Users demand more & more performance (oh, and your boss too).
Just look anywhere on the Internet, you’ll see a trend with increasing frame-rate and display frequency requirements:
Monitors popping up with 240Hz
Mobile phones spawning with 120Hz
Quest 2 now supporting 120Hz
So players expect higher frame-rates from your project. It’s only natural.
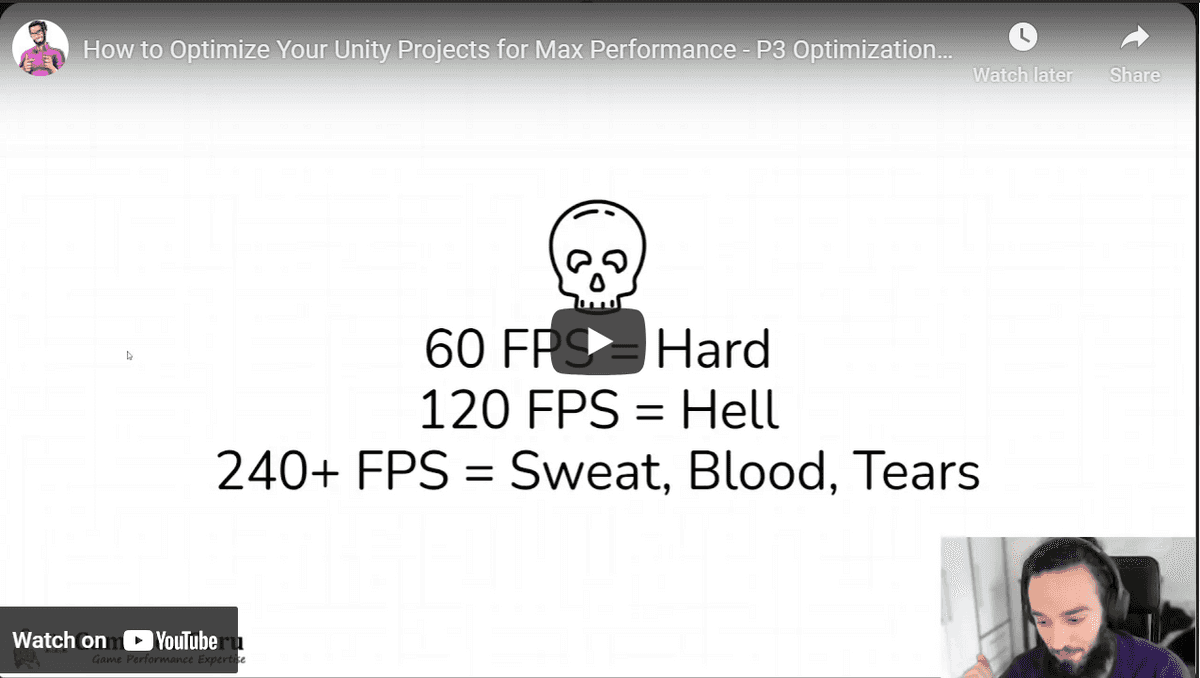
The problem with this is that rendering at 60 FPS is already hard.
And if 60 is hard, well, achieving 120 FPS is hell.
You only have 8ms to reach 120 FPS.

And if we are talking about 240 FPS: that is pure sweat, blood and tears.
But back to 120Hz: if you think 8ms is a lot of time, think twice.
Let’s assume that you are just drawing a cube. That can very well take 2ms of your CPU time due to a baseline cost. That leaves you with just 6ms.
And guess what?
Unity steals even more of that time to do physics processing, animation, UI, etc..
So suddenly rendering your project within 8ms becomes... let’s say, challenging.
OK, so what can we do about this?
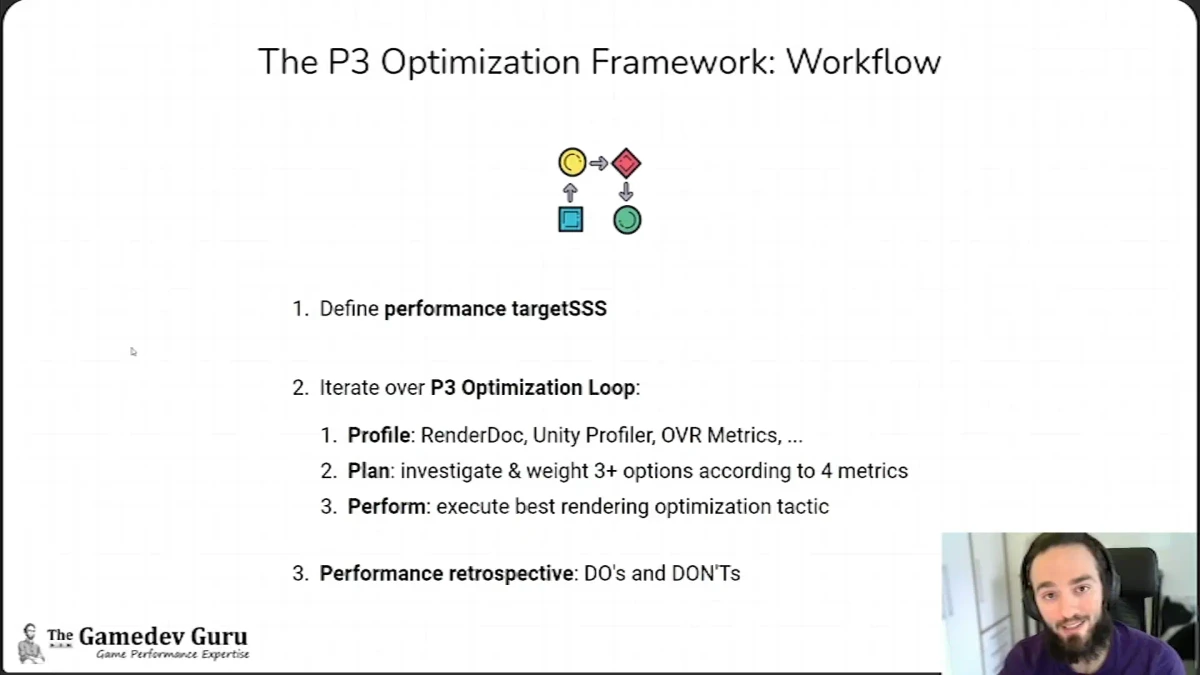
Table of Content
Why Do You Need a Unity Optimization Framework?
Well, performance optimization becomes exponentially painful when you go above 30 FPS. Especially if you are not experienced in optimization.
So what you need is to follow a structured optimization process that lets you ship a high-performing project.

A framework that whispers in your ear what your best next step is at any given point in your Unity optimization journey. A framework that takes you from zero to 72 FPS, from 72 to 90 FPS, from 90 to 120.
All in all, a framework that takes you from 0 to whatever else the market demands now... and in the next months.
An Overview
Just like an algorithm, you need a process that takes an input (profiler data) and produces an output (the best next steps to follow).
Let’s see the high-level overview of the P3 Optimization Framework
First, you want to define your performance targetsss*.
* I know how to spell. I put three ‘S’ on purpose to show you that there are multiple performance targets you must consider.
It’s frame-rate, yes, but we also care about loading times, memory budget, package size and all these little things that player notice and review your project for.
After that, you iterate over the P3 Optimization Loop. Each time you iterate over this loop, this framework will give you a substantial performance boost and you’ll get closer to your performance goals.

Here’s how the P3 Optimization Loop works:
Profile: here, it’s all about gathering intel about your bottleneck(s) to help you craft your optimization options. This includes profiling tools like RenderDoc or VR, Matrix, unity profiler, PIX, VTune, etc.
Plan: investigate and weigh at 3+ options to combat this bottleneck according to 4 metrics related to cost and gains.


