Tutorials are those parts of a game that teach you how to play.
Hang on, allow me to rephrase.
Tutorials are burning garbage.
They’re obnoxious, condescending and disruptive to play. They tend to leave the players confused, break all immersion right off the bat, or sometimes they last so long that the player moves on to a different game altogether. There are countless issues with the archetypal tutorial, many of which are seemingly unsolvable.
And here’s the worst part: tutorials are also probably essential to your game. Simply getting rid of the tutorial is very often a terrible solution, as it just leaves players too confused to play. While some gamers may figure out a majority of a game’s mechanics by fiddling around with the controls and interacting with different objects, many people (especially in genres like strategy games) would just drop a game they can’t understand.
So where’s the catch? Most of the problem lies in the fact that we are used to thinking of tutorials as text.

The tutorial of N++. While the first stages do a fantastic job at introducing all mechanics, this is really not what anyone wants to see when they open a game
While language has been used as the primary means of communication for quite a while now, unfortunately a lot of the time it just adds noise to a game. A lot of players skip any text whatsoever, but those that take the time to read find that it can be a boring obstacle blocking them from the promise of doing. Generally, we want to play our games, not read them. And tutorials are a part of games, therefore:
A TUTORIAL SHOULD BE PLAYED, NOT READ
Now, a lot of the time this is a total pipe dream. There will inevitably be some traditional teaching in strategy or open-ended games, for example. Sometimes a genre with simpler mechanics, such as a platformer, will still benefit from some text tutorials. It is, however, a good practice to try and replace most of your text tutorials with a more organic and fun way of teaching - invisible tutorials.
Invisible tutorials are seamlessly integrated in the gameplay, communicating all the necessary information without using text, patronizing the player or disrupting the flow of the game. So far, talk about this topic seems to be more about great examples of invisible tutorials rather than discrete methods, so this article should help you create your own invisible tutorials by examining some simple and easily applicable methods, starting with versatile ideas and moving on to more case-specific solutions.
It should be noted that the usual tips for creating good tutorials also apply to invisible tutorials. For example, while it’s much harder to overwhelm a player with an invisible tutorial, you still shouldn’t front-load your invisible tutorials, at least to avoid pacing issues. Playtesting is also important here, to make sure you’ve communicated all the important information.
Affordances
Perhaps the most universal method for indirect teaching is something that every designer uses, whether they know it or not - affordances. Affordances are cues in design that indicate how something is used. A lot of the time, this is extremely obvious: players avoid spikes, know what a gun does, use keys on locks, or react to a danger sign. Games are full of these little hints of how a mechanic works based on its visual representation and how it corresponds to real-life objects that the player is more familiar with.

Superbrothers: Sword & Sworcery EP doesn’t have a pop-up window telling you to run from this creature, because it looks super scary
This is why affordances are so useful - they’re intuitive. The player can get a grasp on these concepts without any mental effort - the mechanics turn into something they already know or something that seems obvious.

Shigeru Miyamoto, creator of Super Mario Bros, famously said about the choice of including coins: "Thus, when we were thinking about something that anybody would look at and go 'I definitely want that!', we thought, 'Yep, it's gotta be money.'"
When creating affordances, you have to keep your target audience in mind, since different age groups or cultures might create different associations with game elements.
To use affordances, just remember the “form follows function” rule. A lot of the time, this is extremely simple, especially with environmental mechanics.
Affordances can also be used in creative ways to communicate simple concepts to a player. With the use of colours, music, sound and other more abstract game elements, you can create something like a seamless, unnoticeable hint system. For example, Rain World uses our association of the colour red as an indicator of danger and the colour green as an indicator of safety to warn the player about predators or food. The game also uses tense music to create a disquieted mood around predators, using sound cues as a sort of affordance.


Rain World gives you a (sometimes functional) little buddy who tries to communicate important lessons with the use of indecipherable symbols in more informative colours
However, game mechanics don’t always follow the same rules as something the player can draw a connection to. Mechanics or settings that don’t match our world, as well as complex, unintuitive systems limit the use of affordances. While affordances are the most universal way of teaching a player without words, they are also very limited in the amount of information conveyed, often requiring different methods for teaching.
Skill gates
When teaching skills to a player, such as movement and combat basics, it’s important to make sure the player understands these concepts and gets a feel for them before moving on to tougher challenges. While arbitrarily preventing progress until the player presses the right button seems like an easy fix, it’s got the same problems as a text tutorial.
Celeste’s prologue freezes time until you perform a dash, stopping the pace of an otherwise intense situation
This is where skill gates come in handy. Skill gates are level design elements that stop the player from progressing until they’ve learned a skill. Because skill gates are a part of the level design and not virtual interface, they allow teaching skills organically; they introduce all the same information except the player doesn’t notice the tutorial.
The most common example used for this idea (or anything else, ever) is level 1-1 from the original Super Mario Bros. Right at the beginning, there’s an enemy blocking your path, and you cannot progress until you’ve figured out how to jump. Without the use of text, the game has guaranteed that the player can jump before the player reaches more complex problems involving jumps.

Level 1-1 of Super Mario Bros for NES puts this goomba right at the start, only letting you get past it if you figure out how to jump
Another reason why a well designed skill gate can effectively teach mechanics is that it’s simple to reduce the level design down to only the important elements. So, if you’re introducing an enemy and you want the player to have the skill required to deal with that particular enemy, you can strip off everything unnecessary or misleading and only have the level design dictating this encounter. It’s useful to think of skill gates as simple examples of applying a skill.
Unfortunately, there might not always be an obvious way to block the player’s progress in a natural and logical way, and the solution for getting past a skill gate might be too complex. Many mechanics require other solutions.
The demonstrative method
This method is a translation of the “show, don’t tell” rule to tutorials. The demonstrative method is simply showing some process without having the player participate, often leaving the player to observe from afar and taking mental notes before allowing them to interact with the mechanic.

The first level of Stealth Bastard Deluxe teaches some important abilities by demonstrating your clones using them
While skill gates teach a mechanic by giving the player no other choice than interacting with it, the demonstrative method does the opposite - it demonstrates how a mechanic works before the player has a chance to do anything with it.
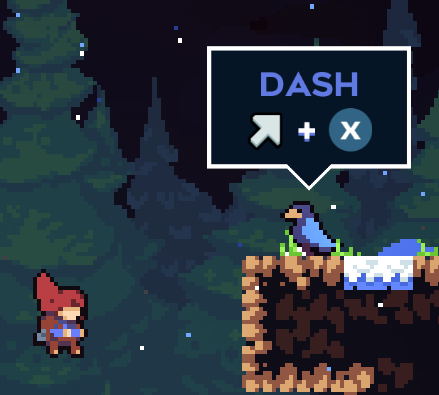
This seems to work especially well for enemies and hazards. You often don’t want your players just running at enemies blindly, as this might result in the player either dying without even understanding how their death could have been averted, or killing the enemy before figuring out their behaviour. The demonstrative method allows the player to study dangerous mechanics from a safe distance.

The first barnacle enemy in Half-life 2 eats this crow instead of you, safely demonstrating how barnacles behave
In 3D games, you mainly need to worry about guiding the player’s attention to what you’re demonstrating. This is commonly achieved with contrasts in colour, lighting, shape, movement etc.
2D games can pose a challenge with the demonstrative method, as the player is almost always able to reach the side of the screen in a matter of seconds, meaning they might be able to interrupt the process you’re showing. Finding ways to slow the player down while allowing them to observe the side of the screen is key here.

The level Bar Hopping from Deadbolt introduces generals - enemies that revive their fallen brethren. The player is demonstrated this process in the first encounter, and one of the generals is further away to make sure the ritual is seen
Trial and error
If all else fails, you might want to make the players do just that - fail. Sometimes it’s best to just let the player make a mistake and learn from it, rather than force a traditional tutorial on them.

In Spelunky, pretty much anything can kill you, and dying is your primary method of learning about the world around you


