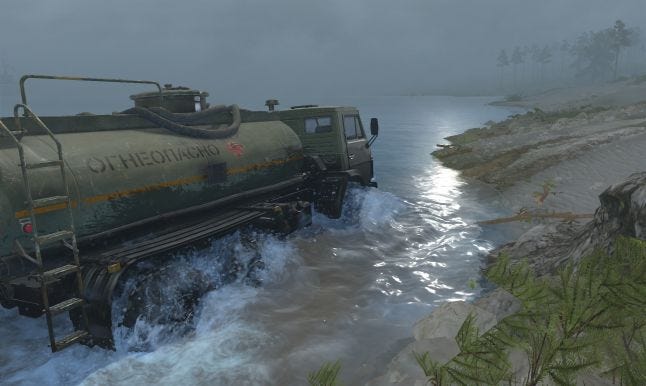
Here we present technical details behind rendering of Mud and Water in Spintires:MudRunner, a driving simulation game, developed by Saber Interactive and published by Focus Home Interactive on Xbox One, PlayStation 4 and PC (Steam).
Spintires:MudRunner doesn't use third-party game engine. The author of this blog post is lead developer of the game.
THE MUD OF MUDRUNNER
Let’s take a game screenshot and decompose it.
How about this one?
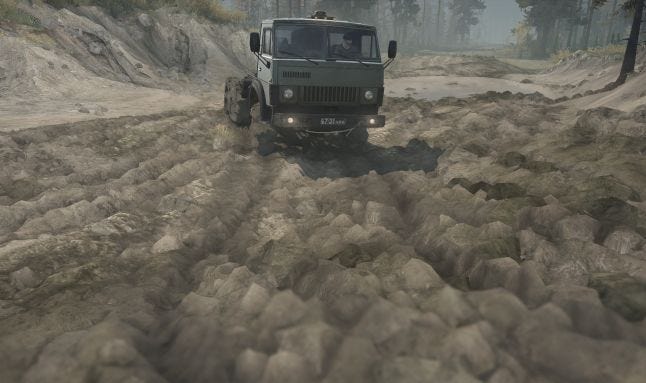
Let’s start by disabling post-processing: SSAO (ambient shadows), FXAA (softens object edges), DOF (blurs foreground), Sharpen Effect and Color Correction:
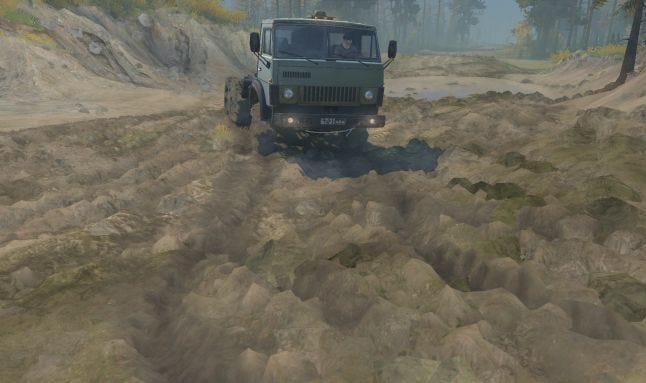
Now let’s take away all the layers in the reverse order they are applied when the game renders a frame.
1. Terrain Mud Decals (will get back to it later)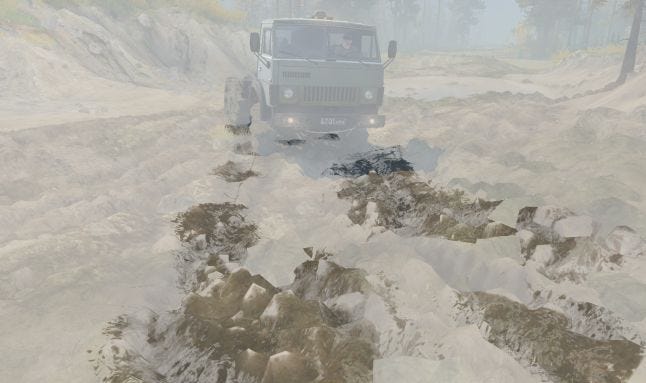
2. Wheel Tracks (will get back to it later)
3. Mud Particles.
Those objects float on top of the mud and are affected by vehicle wheels (can stick to them even), they only act as decoration and don’t affect the physics. Mud particles are simulated by the CPU in a separate thread. A lockless synchronization technique makes that whole effect very performance-friendly.
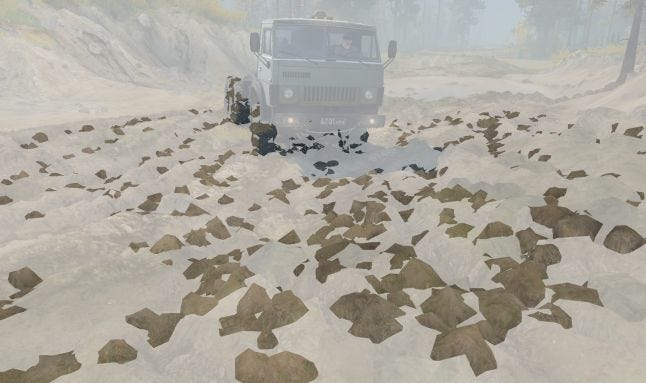
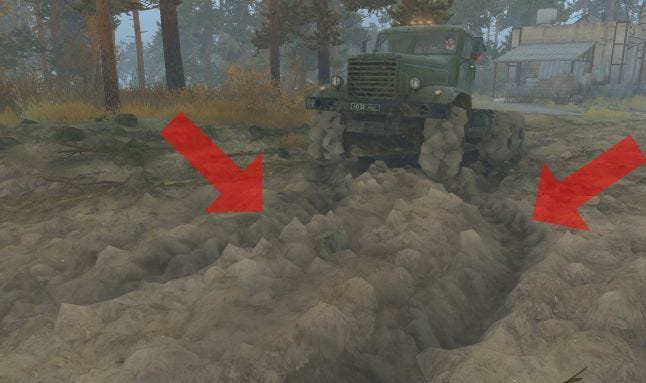
4. Mud Chunks
These are bigger chunks of mud, each is a full-fledged rigid body so they interact with the physics world properly and they even break into smaller chunks, when vehicles drive over.
They are maintained by the same systems that simulate and render all other plant types in the game. (A “plant” is an object that is scattered over the terrain in large quantities, like rocks or trees.)
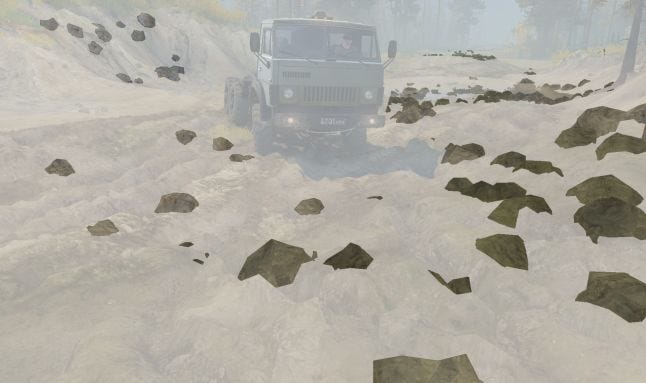
5. Road Overlays with Parallax Effect.
Roads, that map author places within Level Editor, are then baked into a special data that game uses to draw them efficiently. They are not actually rendered as a separate layer and are embedded into terrain shaders.
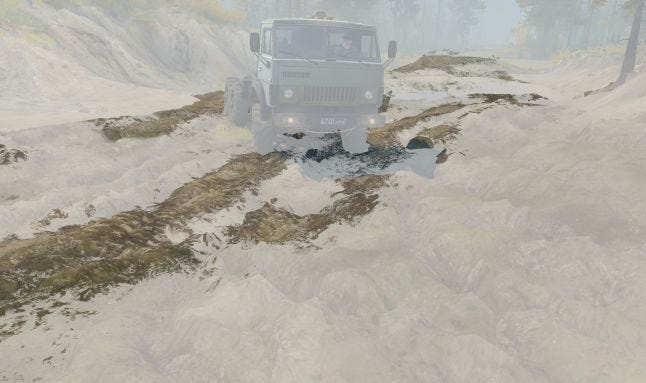
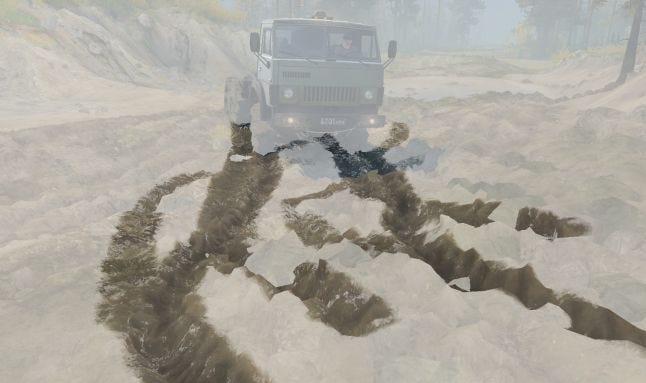
Now we are left with the mud itself, which is a simple heightfield (essentially a 2d mesh):
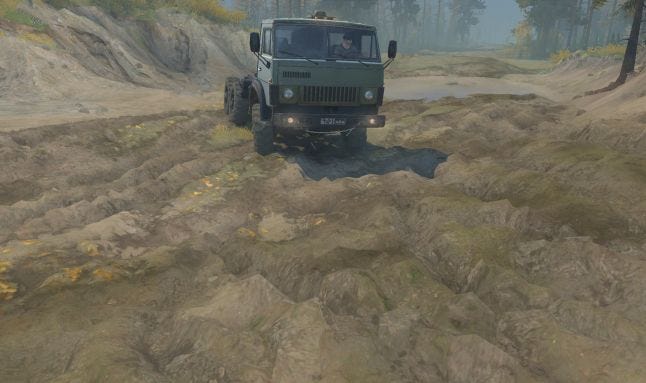
Have a look at its wireframe: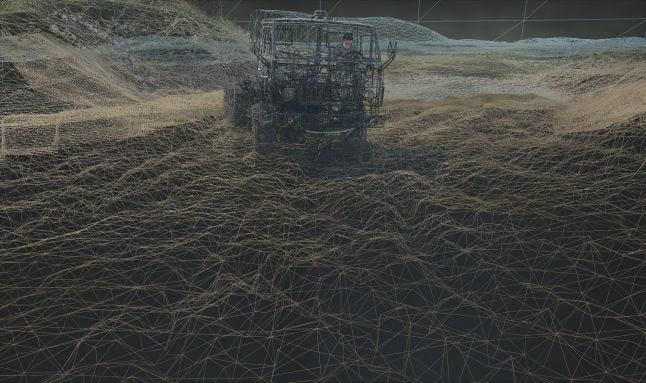
But most of the game level terrain is actually rendered at lower resolution. So if vehicles have not deformed terrain, its wireframe would have looked like this: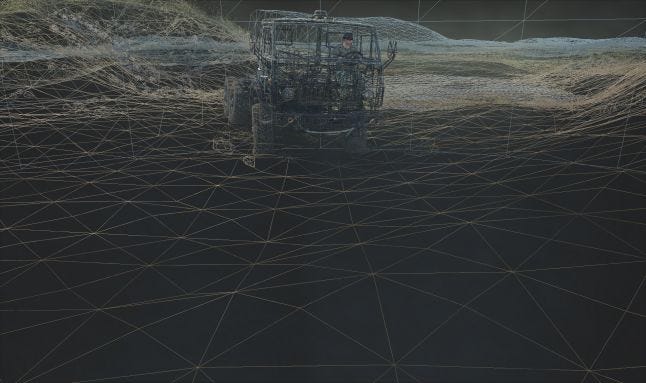
Now let’s have a closer look at each layer…
MUD HEIGHTFIELD
Game levels in MudRunner can be up to 1km x 1km in size. They are subdivided into a grid of 16m x 16m blocks. Each block contains a list of plants (trees, rocks, etc.), base terrain data, mud data (optional), and other data. Game only draws those blocks that are inside camera “frustum”. Only those blocks that are near the truck that player is driving are “active”. Game only performs plants physics simulation, mud simulation and water simulation for “active” blocks.
The mud simulation consists of mud-vehicle physics processing (performed by CPU) and rendering of the mud (performed by GPU). For a number of reasons (CPU and GPU are out of sync on PC, high detalization required for rendering is not required for physics, etc..), those two tasks operate on completely different sets of data. We won’t go into details of physics here, but in short, there is no rocket science involved, but it’s not something Havok (physics engine in MudRunner) can do out of the box.
In order to draw the mud, vertex shader takes in a simple 2d grid of vertices, then fetches two A8R8G8B8 textures that look like this:

Texture 1. 25x25 in size for each block, is used for rendering both low-res base terrain and the high-res mud.
R (red) channel – packed height (elevation). It is unpacked into real-world height with a bit of math.
G (green) channel – grass/dirt materials mix factor. Currently, each block can only mix 2 materials.
B (blue) channel – “tint” factor. Tint adds some color variation to the environment, and illustrates physics properties (“tinted” terrain is softer).
A (alpha) channel – marks portions of base terrain that are substituted by the mud, it’s the only channel that is dynamically updated as vehicles deform terrain.

Texture 2. 128x128 in size, is only allocated for blocks with mud.
R (red) channel – “mud height”, is relative to elevation of base terrain. It gets unpacked into a floating point value with a simple multiplication.
GB (green, blue) channels – used for “mud offset” effect (the mud slides away from vehicles wheels as they move).
A (alpha) channel – “mud tracks”, a blending factor of terrain shader into mud shader, In combination with A channel of Texture 1 that makes mud transition into terrain unnoticeable.
The visual part of mud simulation boils down to properly updating Texture 2:
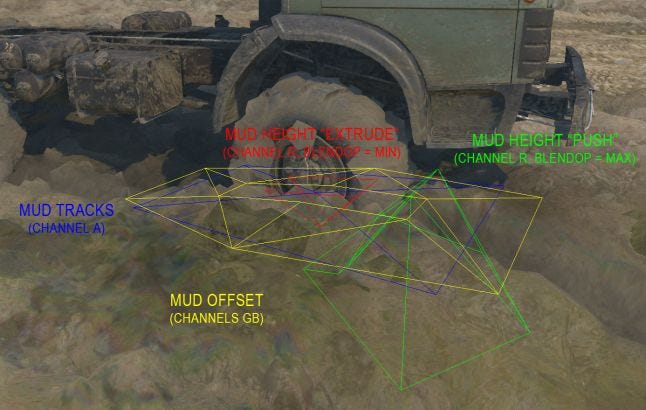
With a knowledge of wheels and chassis positions, their size and velocities, and their current mud penetration depth, CPU forms various “primitives” and draws the into a “Texture 2” (RT – render target), which is then read back by GPU. That is pure empirics and have very vague connection to real world physics!
The mud pixel shader itself is nothing fancy, and it simply blends few diffuse textures based on the normal which it derives from the heightfield data.
Now let’s get to some more interesting stuff…
WHEEL TRACKS
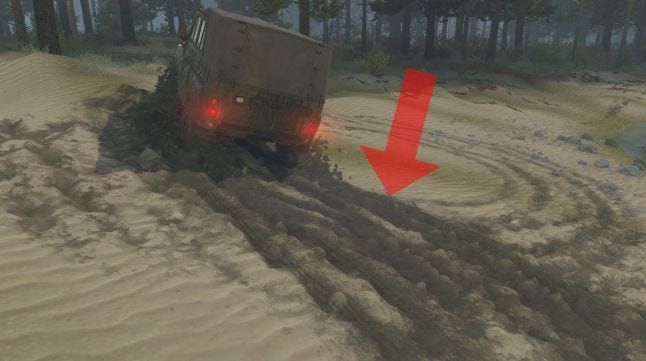
Let’s take another game screenshot and see what steps are involved in rendering wheel tracks:
Wheel tracks are rendered after terrain and most of the environment. So by then we already have screen normals and “wheel tracks screen mask” (masks portion of the screen, on top of which tracks shouldn’t be rendered), additionally to Z buffer or course. The mesh itself is a simple series of trapezes that follow the path of a wheel. But for the parallax effect, that gives tire treads a cool volumetric look, we first need to render wheel track “heights”:
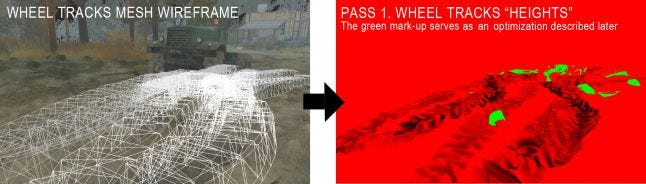
Wheel track heights are required for parallax effect. The textures are projected onto terrain using Z buffer. The tricky part is ordering tracks properly (more recent tracks should cover older tracks). There are several approaches to do this, we use GPU-only method: render tracks with their own z-buffer (so no hardware z-test against scene), and offset more recent tracks towards the camera in vertex shader. Z-test against the scene is performed manually inside pixel shader.
Wheel tracks mesh is then drawn again for a second, final, pass:
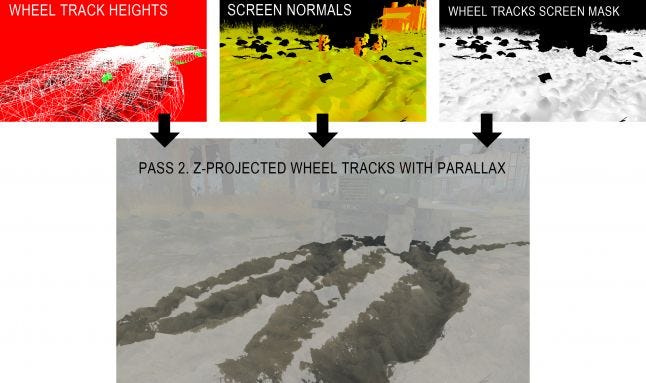
Traditional parallax effect takes multiple sample from associated “heights” texture and then offsets texture coordinates accordingly (we won’t go into details of the math of it). Problem is, if you are z-projecting your texture onto z-buffer, there is no easy way to make said samples. That is why wheel tracks are rendered in 2 passes. The visual artifacts are neglectable with that approach, you just need to make sure you don’t sample from parts of the texture where you don’t have wheel track height info at (that’s what green mark-up of wheel track heights texture is for).
TERRAIN MUD DECALS
When vehicle chassis or wheel moves through the mud at high speed, or when a wheel spins in a mud, it launches mud particles. Mud particles affect per-vertex mud data of most of the environmental assets, and they also generate terrain mud decals:
 Each terrain mud decal has a mesh of oriented box:
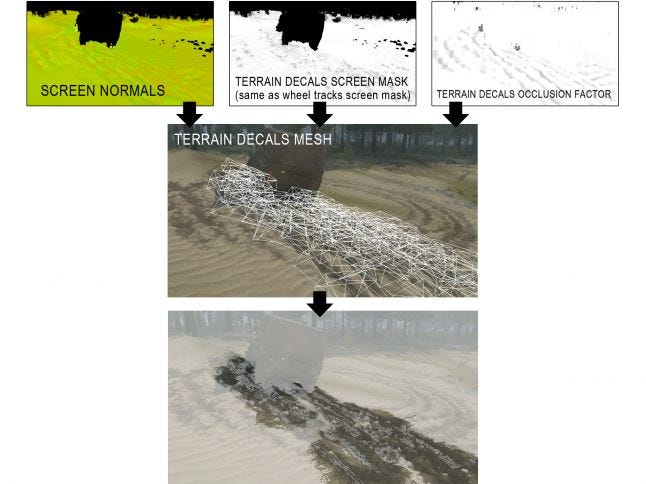
In the same fashion as wheel tracks, after the terrain and most of environment is rendered (it’s called “Color Pass” and it uses MRT – multiple render targets), we have screen normals (used to compute lighting) and terrain decals screen mask (masks out objects that decals shouldn’t be rendered on top of). Color Pass also write occlusion factor for terrain decals so they can be lit more naturally. Decals are z-projected on top of the scene.
Most of the games now feature z-projected decals, so it’s nothing really fancy. Now let's move on to the topic of water...
THE WATER OF MUDRUNNER
Let’s take a game screenshot and decompose it:

Disable SSAO, FXAA, DOF, Sharpen Effect, Color Correction, Motion Blur and Bloom Effect:
Taking away the layers in the reverse order they are applied:
1. Particles
Probably any game has that kind of effect. Particles in MudRunner can be of two types:
“billboard” particles: a


