Introduction
Creating a robust cover system may seem daunting at first, but once you realize it’s just a set of simple techniques glued together, the task at hand will seem a lot less intimidating.
Whether you’re making a next-generation RTS or want to use this in an FPS game, I hope you will find the information in this article helpful. I recommend downloading the demo project and checking out how it all works when put together.
The demo project includes a fully functional implementation of all the techniques discussed above, complete with well-commented source code: https://horugame.com/real-time-dynamic-cover-system-for-unreal-engine-4/
Design
When designing a cover system, the three most important challenges you will face are as follows:
Data generation
Data persistence
Data usage
Since this article focuses on creating a real-time dynamic cover system where cover may become available or disappear completely at run-time, it is essential to apply an optimized approach to all three.
I cover two data generation methods: navmesh edge-walking and 3D object scanning.
3D object scanning
Navmesh edge-walking
If your cover data is generated synchronously, it causes a noticeable hitch in your game’s performance, resulting in lags in gameplay. I demonstrate how to make use of the Unreal Engine’s excellent multi-threaded APIs to parallelize cover data generation, taking advantage of multi-core processing typically found in modern-day gaming hardware.
Similarly, if access to cover data is too sluggish, your game slows down by a considerable amount, consuming large amounts of CPU and/or GPU cycles on cover queries. To avoid this, it is best to use a data structure that was meant for real-time concurrent lookup of spatial data: the octree. Using octrees appropriately also allows storing custom cover data, e.g. cover material (stone vs. hay), height, health, etc. with quick and efficient access.
Data usage optimizations – for when your units are actively deciding which cover point to use in real-time – minimize the number of raycasts and ensure the availability of spatial lookup facilities (octree) as well as support for direct fetch requests (arrays or maps).
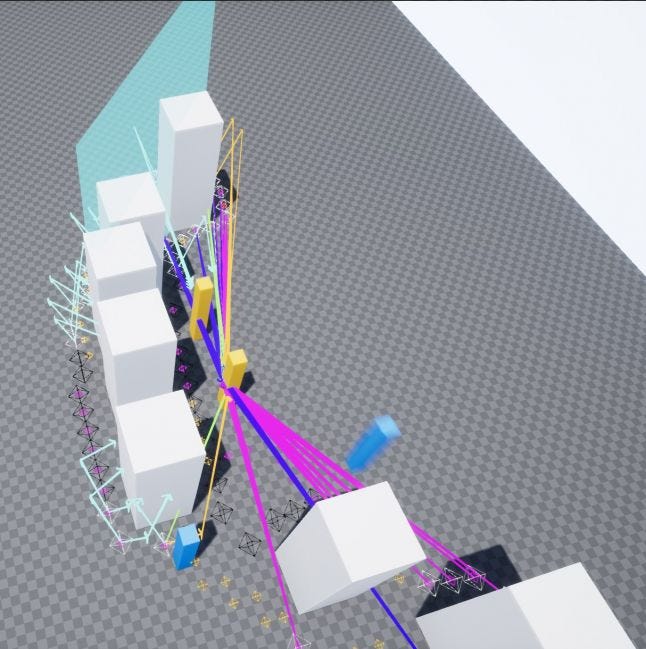
In order to project how a unit may step out of cover to open fire, it is necessary to map out its peeking or leaning capabilities. A tank can’t peek out of cover – a foot soldier can. The best way I’ve found to accomplish this without using too many raycasts is to define “leaning offsets” on units. These are just simple floats that get added to the unit’s location upon hit-testing from cover.
The final feature is real-time dynamic updates – whenever a new object is spawned in the game, we generate cover points around (and inside) it using Unreal’s event system via delegates. This ensures that we’re not wasting resources on Tick, which can slow the game down significantly, if care isn’t taken. We hook into Recast’s navmesh tile update events and update cover points in the corresponding tiles only when necessary.
Despite all the techno-speak, it’s actually wonderfully simple: a few trivial for-loops and a couple of missing pages from the UE4 documentation. So let’s get cracking!
Generating Data – Two Avenues
There are multiple strategies for generating cover data, and I cover the two most prominent ones: first, a technique that’s similar to 3D scanning, and then a navmesh edge-walking approach.
3D object scanning relies on a 3D grid that’s created around an object, and you typically have 3 main for-loops to do the bulk of the work, one for each axis. You iterate over the points on the grid that are a constant distance apart and check if you hit anything with a raycast.
3D object scanning:
Distributes cover points more uniformly than edge-walking
Supports objects that are incompatible with the navmesh, yet provide cover, e.g. “force fields”
Has minimal chance for errors
Is slower (because of the sheer number of grid points)
Copes poorly with landscapes
The navmesh-based approach relies mostly on navmesh data and doesn’t deal with objects per se: if a point on the map is NOT covered by any navmesh polygons, then that means it is occupied by something large enough to provide cover.
Navmesh edge-walking:
Is considerably faster
Handles rugged landscape topology easily
Can’t deal with force fields and the like
Is somewhat more error-prone: tile boundaries, mismatched points
Does not distribute cover points as uniformly
I cover these in more detail as we go on, so let’s dive into the nitty-gritty of 3D object scanning!
Object-Based Cover Point Generation
Rather than scan the navmesh for holes, we scan the objects themselves. Think of it like scanning an object in 3D: you slice it up along the X, Y, Z axes, divide the slices into a grid and use raycasts to determine where the object’s perimeter – or 3D circumference – meets the ground. This also works well for irregularly-shaped objects, e.g. C-shapes, rings, castles, you name it.
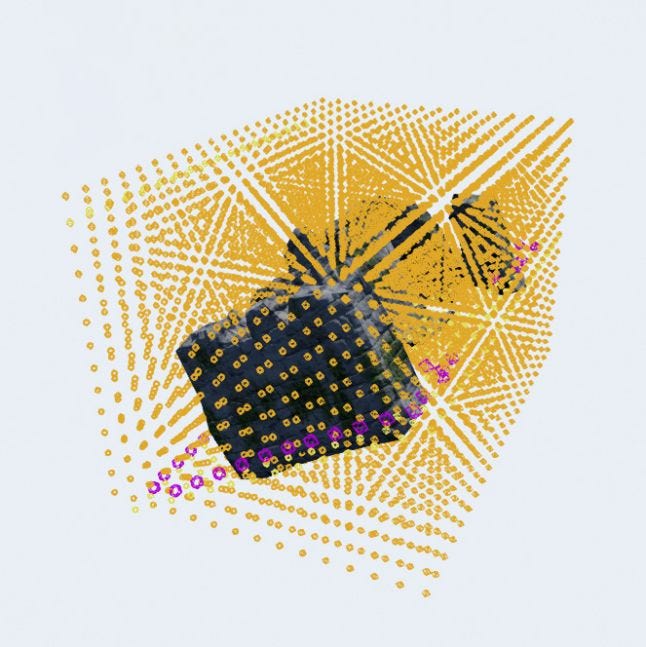
A 3D scan grid may look something like this:
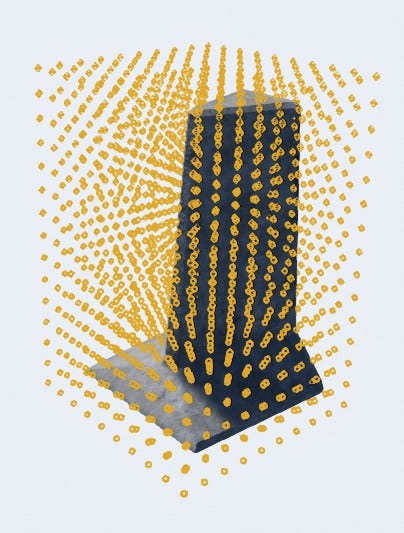
Orange markers represent 3D grid points in and around an object.
This is essentially accomplished by 3 very simple for-loops that just divide the actor’s bounding box into a 3D grid. But there’s a lot of points on the grid and some of them are not even close to our object, so we have to filter them out.
And why not just use a 2D grid, you might ask? Because of two things:
Multi-story objects (think of houses with multiple floors)
Rotated objects on slanted grounds
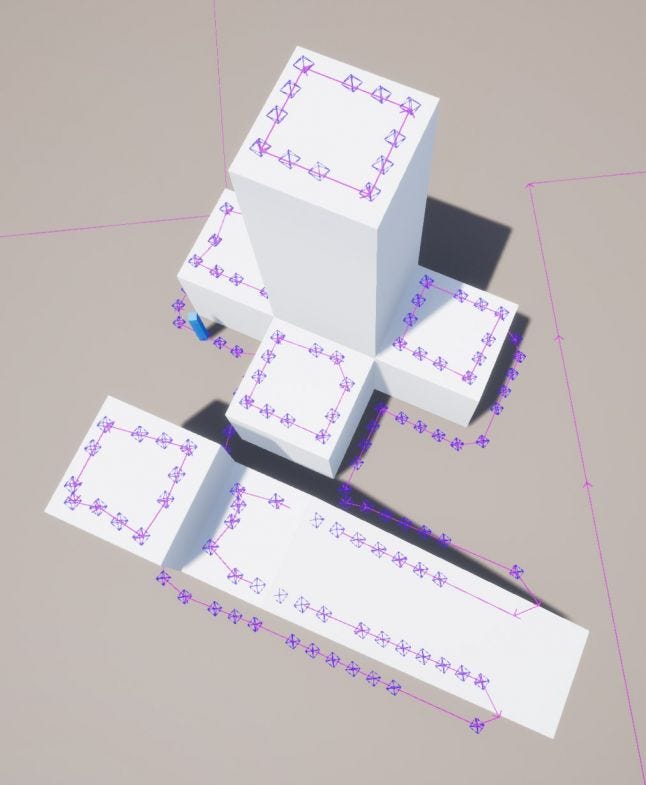
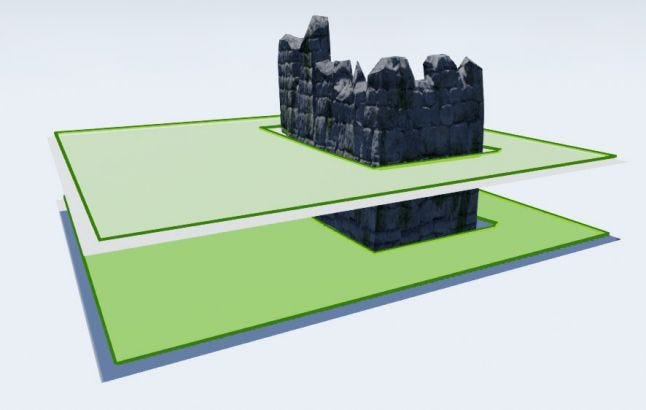 A multi-story navmesh.


