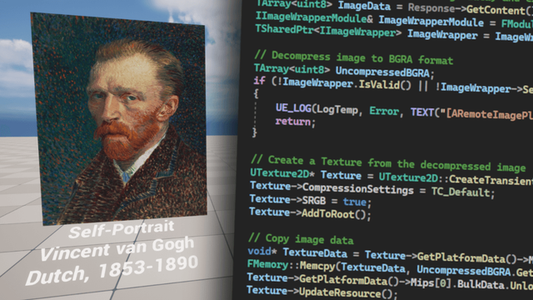
In today's post, I'd like to show you how to retrieve an image provided by The Art Institute of Chicago via its public API, how to create a texture from this image, and how to feed this texture to a material and render it on a plane accompanied by a floating text with title, name of the artist and some other details.
To achieve that, we're going to write a custom C++ class derived from Actor, with UStaticMeshComponent and UTextRenderComponent both attached to a USceneComponent set as a RootComponent.
The key property of this class will be CatalogId, an integer that tells which artwork to fetch from the collection of the above-mentioned art institute, using an HTTP request.
We'll be able to build an entire virtual gallery using just this single custom actor. Adding a new artwork would be as simple as placing an instance of the actor into our map and setting the CatalogId.
However, I like my tutorials to be beginner friendly even when it covers slightly advanced topics. Let's take a step back now and talk a little bit about what is an API.
If you're already well familiar with the term, feel free to skip the following few paragraphs and dive straight into the implementation from Preparing a new Unreal Engine project.
What Is an API?
For the rest, API stands for Application Programming Interface. It provides a set of instructions that enable different systems to communicate with one another, specifying the methods for sending and receiving data, as well as the actions that can be performed.
In our scenario, we have two systems, one is the application we're going to build, using the Unreal Engine, and the other is a web server that provides an API for retrieving data from a database of The Art Institute of Chicago (ARTIC).
The web server acts as an API provider, while our application serves as its consumer. As long as a consumer makes a valid request, the API provider doesn't concern itself with who the consumer is or what they plan to do with the data; it simply provides it.
Actually, we could build a similar project in Unity or use an API from any other application that can make an HTTP request, such as a web browser. You can make a request right now by simply clicking on the following link:
https://api.artic.edu/api/v1/artworks/129884
When you clicked the link, your web browser made a GET request using the HTTP protocol and received a response containing data in JSON (JavaScript Object Notation) format.
Upon examining the JSON data¹ that you received, you'll notice that it contains information about Alma Thomas's artwork, Starry Night and the Astronauts, which is stored in the ARTIC collection with an ID of 129884.
1) To make the JSON data more readable, you may want to install a browser extension, such as "JSON Prettifier" or "JSON Formatter." These extensions will format the data in a more organized and easy-to-read manner.
How does this work? How can we retrieve and utilize data from a single API that doesn't differentiate between a web browser and an Unreal Engine application? The answer lies partly in the previous paragraphs.
This is because the API provides data using a standardized protocol and format. Your web browser knows how to send a request using the HTTP protocol and how to handle the response.
Fortunately, Unreal Engine is also equipped to handle this. It includes an HttpModule and JSON Serializer that we'll use to retrieve and parse data, respectively.
There's much more to learn about APIs and the technology behind them, including various protocols and data formats such as XML and others. Of significance is the fact that both requests and responses have headers, although I didn't cover them in this brief introduction.
Some APIs require authentication, which opens up another deep rabbit hole to explore. It's also worth noting that not all APIs are web APIs, and there's something called REST (Representational State Transfer), which is a specific architectural style and widely used approach for building APIs.
Preparing a New Unreal Engine Project
Now let's start building something. If you want to follow along (and I highly recommend that you do), begin by creating an empty C++ project in Unreal Engine 5.1.1.
It might work on other versions too, but version 5.1.1 is the one I've built the example project, so I cannot guarantee that it would also work on, for instance, version 4.27.
I've named my project FetchArt, but feel free to choose any name you like.
Creating a Material
We won't be needing any starter content, but we do require a material that we'll use to render texture to a plane later on.
In the Content Browser, create a new folder by right-clicking and selecting New Folder. Name the folder Materials. Then, create a new material by selecting New Material from the same context menu. Name the material ExampleMaterial.
Open the material and navigate to the Material Graph. From there, right-click inside the graph and search for Texture Sample. Once the TextureSample node appears, click on it to add it to the Material Graph.
Finally, right-click on the Texture Sample node and select Convert to Parameter. This will convert the Texture Sample node into a parameter node, allowing us to easily change the texture used by the material later on.
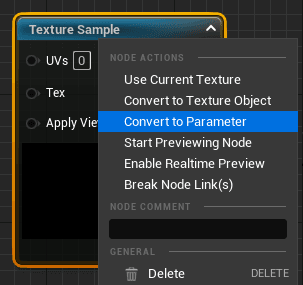 We convert the TextureSample node into a TextureParameter node so that we can easily assign a texture created from an image fetched from an API in our custom C++ class derived from Actor later on.
When converting the Texture Sample node into a Texture Parameter node, make sure to name the parameter TextureParameter and double-check the spelling. This is important because we'll be referencing this parameter by name in our C++ code.
With the Texture Parameter node selected, look for the Material Expression Texture Base section in the Details panel on the bottom left of the editor. To assign a default material, click on the small curved arrow icon located on the right side of the Param row.
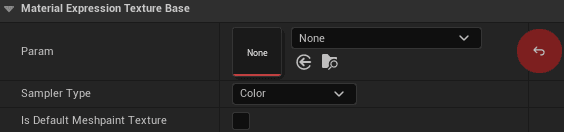 We need to assign any texture to TextureParameter, even if we're not going to use that particular texture. This is because, without any assigned texture, we won't be able to save the material after we connect the RGB output pit of the parameter with the Base Color input of the parameter due to an error.
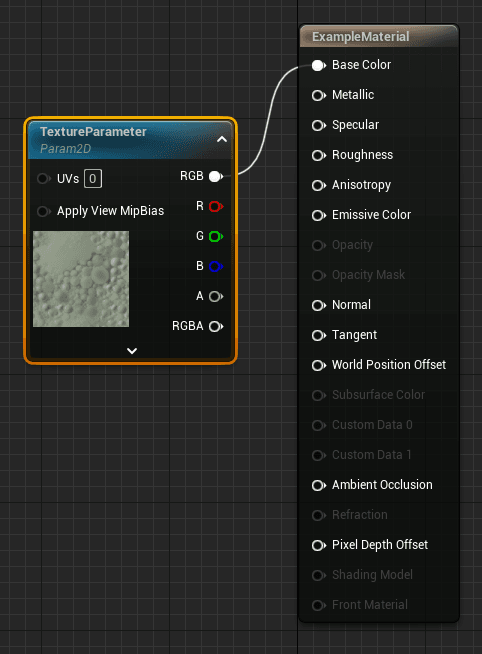
Finally, connect the TextureParameter output pin to the Base Color input pin of the ExampleMaterial. Make sure to save the material before closing the window or tab.
 Fun fact: this default texture has been with Unreal for more than 20 years. I remember it well from my days of making custom maps in UnrealEd 2.0 for LAN parties where my friends and I used to spend hours playing Unreal Tournament (GOTY 1999).
Adding a Custom Actor Class
In the Content Browser, enter the C++ Classes folder of your project. Right-click on the folder and select Add New C++ Class. From the pop-up window, select Actor as the parent class and name the class RemoteImagePlane.
 According to the Unreal Engine documentation, "An Actor is any object that can be placed into a level... Actors support 3D transformations such as translation, rotation, and scaling", which makes it the perfect parent class for our needs.
Importing Modules
Time to write some code. First, to prevent linker errors, you need to specify the modules that our project depends on in {YourProjectName}.Build.cs.
This C# file is a part of the Unreal Build Tool (UBT). When a project is built, UBT reads the file and uses it to generate the necessary build scripts and configuration files.
One typically adds modules when needed in Unreal Engine, but since I have already implemented the code for this tutorial, I already know which modules we will need, which are:
- HTTP
- Json
- JsonUtilities
- ImageWrapper
Add these module names to the PublicDependencyModuleNames list as follows:
PublicDependencyModuleNames.AddRange(new string[] { "Core", "CoreUObject", "Engine", "InputCore", "HTTP", "Json", "JsonUtilities", "ImageWrapper" });Header File
Now that the modules have been added to the project, it's time to make changes to our RemoteImagePlane class. Open the header file for this class, which is RemoteImagePlane.h.
This actor doesn't need to run any logic in every tick, so you can safely delete the declaration of the Tick method. Don't forget to also delete the implementation of the method in the source file, RemoteImagePlane.cpp. Additionally, in the constructor change the value of the PrimaryActorTick.bCanEverTick flag from true to false.
Back in the header file, between the #include RemoteImagePlane.generated.h and UCLASS() macro, add the following forward declarations and type definitions:
class UStaticMeshComponent;
class UTextRenderComponent;
class USceneComponent;

class IHttpRequest;
class IHttpResponse;

typedef TSharedPtr<IHttpRequest, ESPMode::ThreadSafe> FHttpRequestPtr;
typedef TSharedPtr<IHttpResponse, ESPMode::ThreadSafe> FHttpResponsePtr;Under the protected access specifier, declare the two delegate methods as follows:
void OnResponseReceived(FHttpRequestPtr Request, FHttpResponsePtr Response, bool bWasSuccessful);
void OnImageDownloaded(FHttpRequestPtr Request, FHttpResponsePtr Response, bool bWasSuccessful);To implement the desired functionality, our custom Actor requires a few components. These include:
UStaticMeshComponentto render a plane mesh on which we'll set a dynamically created material instance. The fetched artwork will be rendered on this component as a texture.UTextRenderComponentto display the title of the artwork, the name of the artist, and other relevant information about the artwork.USceneComponentto be used as a root component and to attach the other two components.
We don't want to attach the UTextRenderComponent to the UStaticMeshComponent or the default root component of the Actor, because it would restrict our ability to adjust the position of the text.
We'll need to modify the scale of the Plane to match the aspect ratio of the fetched artwork. To address these issues, we'll use a USceneComponent as the root component and attach the other two components to it.
Declare these three member variables, pointers to the above-mentioned classes, as follows.
UPROPERTY(EditAnywhere)
UStaticMeshComponent* PlaneComponent;

UPROPERTY(EditAnywhere)
UTextRenderComponent* TextComponent;

USceneComponent* SceneComponent;Also declare two additional member variables to set the width of the texture for our material and the ID of the artwork we're going to fetch:
UPROPERTY(EditAnywhere)
int TextureWidth = 512;

UPROPERTY(EditAnywhere)
int CatalogId = 129884;The last thing in our header file is a little helper method. This method pulls out properties from a received JSON without repeating the same code multiple times.
bool TryGetStringField(const TSharedPtr<FJsonObject, ESPMode::ThreadSafe>& JsonObject, const FString& FieldName, FString& OutString) const;Source File
Let's move on to the source file, RemoteImagePlane.cpp. The first step is to include all necessary header files:
#include "RemoteImagePlane.h"
#include "Http.h"
#include "JsonUtilities.h"
#include "Components/StaticMeshComponent.h"
#include "Components/TextRenderComponent.h"
#include "Components/SceneComponent.h"
#include "Materials/MaterialInstanceDynamic.h"
#include "Engine/Texture2D.h"
#include "IImageWrapperModule.h"
#include "IImageWrapper.h"In the constructor, where we already set PrimaryActorTick.bCanEverTick to false, create a USceneComponent and set it as the Actor's root component.
SceneComponent = CreateDefaultSubobject<USceneComponent>(TEXT("SceneComponent"));
SetRootComponent(SceneComponent);To create a UStaticMeshComponent in a similar way, start by finding the Plane mesh among Unreal Engine basic shapes using FObjectFinder. If the search succeeds, set the Plane as the component's static mesh. In case of failure, log an error using the UE_LOG macro. Finally, attach the PlaneComponent to the SceneComponent.
PlaneComponent = CreateDefaultSubobject<UStaticMeshComponent>(TEXT("PlaneComponent"));
static ConstructorHelpers::FObjectFinder<UStaticMesh> PlaneMesh(TEXT("/Engine/BasicShapes/Plane"));
if (PlaneMesh.Succeeded())
{
	PlaneComponent->SetStaticMesh(PlaneMesh.Object);
}
else
{
	UE_LOG(LogTemp, Error, TEXT("[ARemoteImagePlane] Failed to find mesh"));
}
PlaneComponent->SetupAttachment(SceneComponent);The last thing we need to do in the constructor is to create a UTextRenderComponent and attach it to our SceneComponent as well.
No tags.